
Settings
To download the plugin file for your site, obtain the API key, change your domain URL or remove the site, navigate to Sites > yourdomain.com > Settings in Patchstack App.
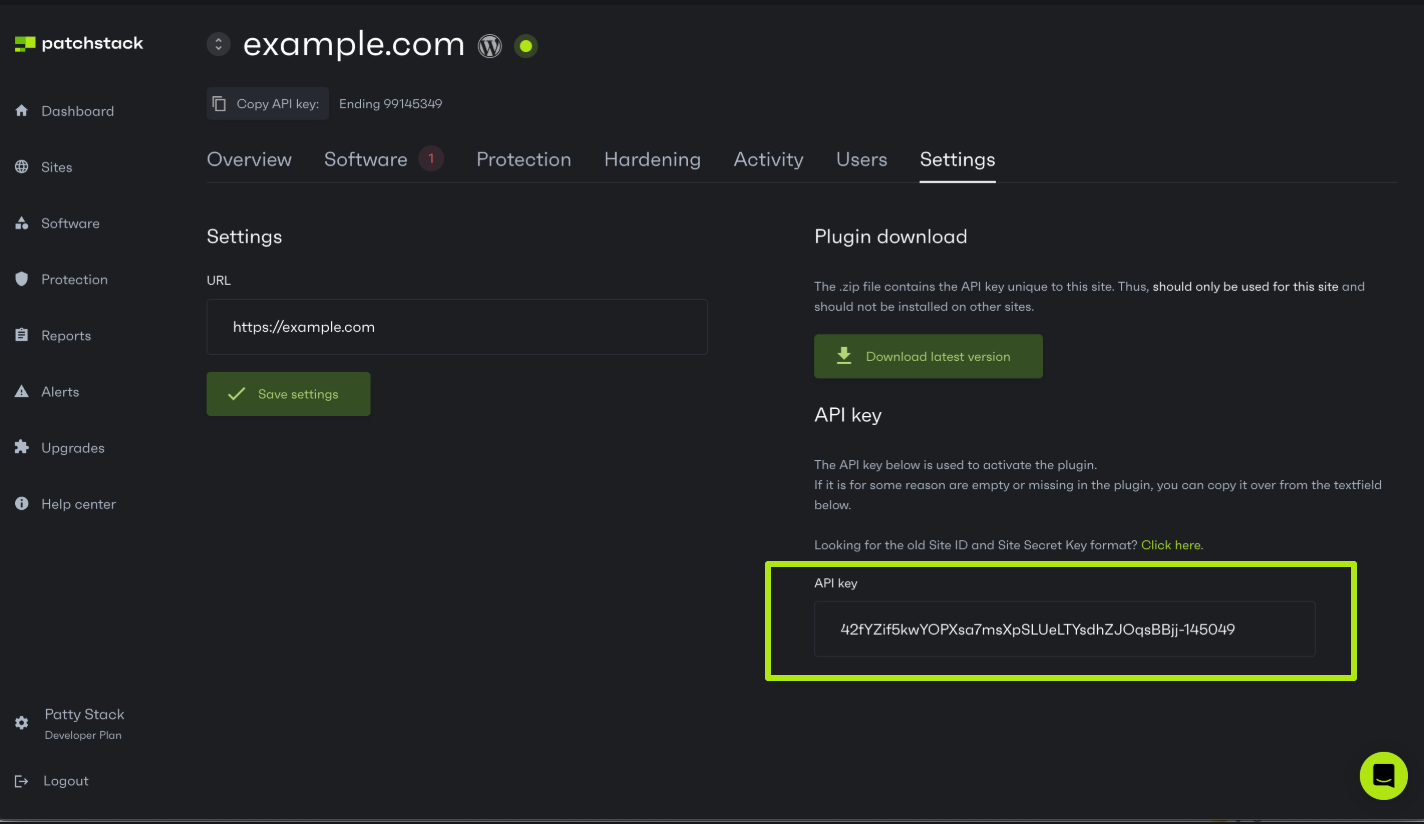
From this page, you can:
- Find your site API key that needs to be inserted into the plugin
- Change your domain, in case it has changed or entered incorrectly
- Give the site a name of your own, shown across Patchstack in place of its URL
- Put the site in one of your groups, or take it out of the one it is in
- Download the Patchstack plugin .zip file here by clicking Download latest version . Note that this plugin file will come with pre-inserted API key, so you can use the same .zip file for only this particular WordPress application
- Remove the site from Patchstack, which frees up a slot for another one
Changes to the name, URL and group are saved together with the Update button at the top of the Website card.
How to remove a site
Section titled “How to remove a site”- Scroll to the Remove website card at the bottom of the page
- Click Remove website
- Choose whether Patchstack should uninstall the plugin from the site for you. Leave it off and the plugin has to be removed by hand
- Click Remove to confirm
Removing a site cannot be undone, and it does not cancel your subscription — see the Billing page for that.
How to upload the Patchstack plugin to WordPress
Section titled “How to upload the Patchstack plugin to WordPress”To upload the plugin to your WordPress site:
- Go to your WordPress administration page
- Navigate to Plugins > Add New
- Click on Upload Plugin
- Upload the .zip file from there
- Click Activate after uploading the plugin
If you need any assistance, don’t hesitate to reach out to our live support chat!